
West Coast Trail in Canada: The Ultimate Hiking Guide

Looking for a hiking guide to one of the best hiking trails in the world? Here is my ultimate guide to Hiking the West Coast Trail.
The West Coast Trail is widely considered one of the best hiking trails in the world. Covering 75 km (47 mi) along Vancouver Island’s rugged west coast, the iconic trail takes hikers through old-growth rainforests, along sandy Pacific Ocean beaches and over rocky coastal cliffs. Naturally, this means the views on this hike are spectacular!
However, the views aren’t the only reason for the West Coast Trail’s fame. Hiking this trail is no small feat, with technical terrain and challenging obstacles including boulder fields, cable cars, never-ending mud, and over 70 ladders to climb. Therefore, being prepared is essential.
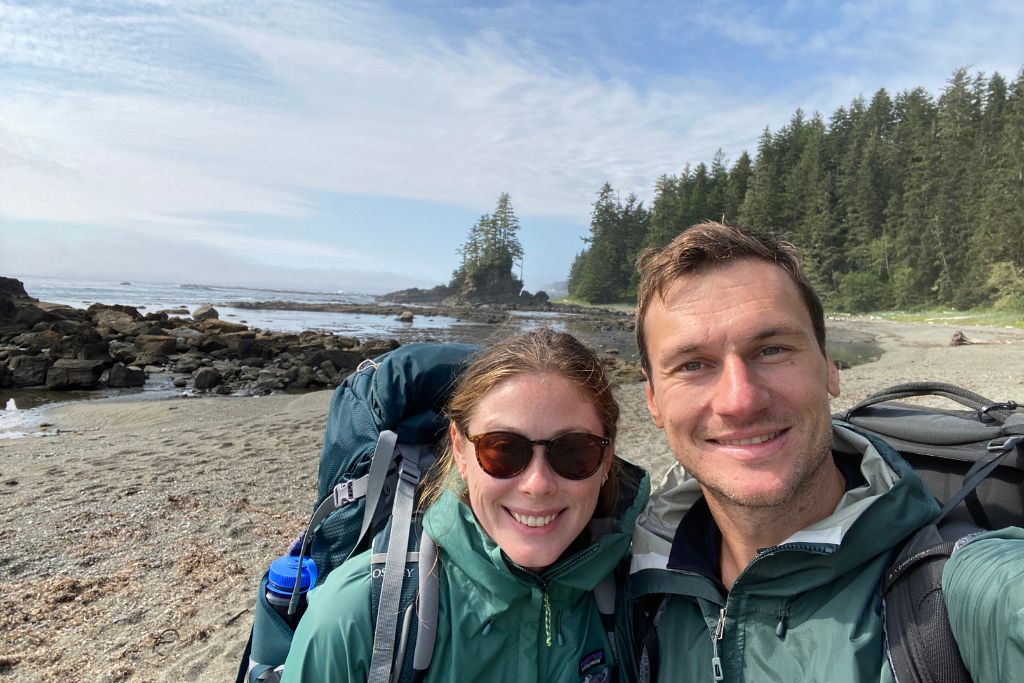
I hiked the trail in 2021 and it was actually my first-ever backpacking trip. Luckily, thanks to my partner having some experience, and doing tons of research, I was surprisingly well-prepared and had an amazing time. Although figuring everything out was a very time-consuming task.
To make it easier for you, I’ve compiled everything you need to know before embarking on your WCT adventure, so you can also have an epic experience.
Short on time? Here’s a quick look at what this trail involves:
Location: Pacific Rim National Park, Vancouver Island, BC, Canada
Distance: 75 km (47 mi) official distance (actual distance likely longer)
Duration: Typically hiked in 6-7 days
Permits & Reservations: Required (70 permits available per day)
Cost: Fees are $241.75 CAD per person + additional expenses
Start & Endpoints: Pachena Bay, Gordon River, and Nitinaht Narrows (mid-way)
Ferry Crossings: 2 (Gordon River and Nitinaht Narrows)
Orientation: Mandatory orientation before starting the hike
Direction: Can be hiked in both directions
Terrain: Mix of technical beach and forest trail, with over 70 ladders
Ascent & Descent: Around 1,800 m (5900 ft) total up and down
Camping: 13 designated beach campsites + wild camping permitted
Safety: Slippery terrain, water crossings and wildlife
Opening times: From May 1 to September 30
Best Time to Go: July and August
West Coast Trail Overview
The iconic West Coast Trail is located on Vancouver Island’s southwest coast in British Columbia, Canada. It’s in the heart of the Pacific Rim National Park, which is one of the best places in Canada to explore unspoiled landscapes, spot marine and wildlife, and experience the power of nature.
This is a multi-day hike and is generally considered difficult. The hike is usually completed in 5 to 7 days and takes hikers through a variety of technical terrain. You can hike along the beach for a lot of the trail, but there is also always an inland trail option, as the tide won’t always be in your favour.
Location
The West Coast Trail is located in Southwest Vancouver Island in Pacific Rim National Park, between the towns of Port Renfrew and Bamfield.
Distance
The official trail distance is 75 km (47 mi), but your actual distance will vary based on which routes you take. Most hikers’ GPS devices will end up tracking quite a bit more than the expected 75 km. Although the norm is around 10 km (6 mi) more, I’ve heard of total distances up to 100 km (62 mi) being recorded!
Duration
The traditional route is 6-7 days, but many people take more or less time than this. Your permit allows you to stay in the park for up to 14 days, so this is the maximum amount of time you can take. Occasionally ultra trail runners will run the trail in 1-2 days.

Cost
The cost to hike the trail is $241.75 CAD per person (including taxes) which you pay at the time when you make your reservation. This includes the trail permit ($160), two ferry crossings ($28 each) and the reservation fee ($25.75).
However, there are some additional costs to also factor in. See here for the full price breakdown and list of additional expenses.
Start and Endpoints
There are three entry and exit points on the West Coast Trail – Pachena Bay (near Bamfield) at the north, Gordon River (near Port Renfrew) at the south, and Nitinaht Narrows (near Nitinaht village) at the mid-way point. You can hike the trail in either direction, but you must start at the entry point listed on your permit.
Ferry Crossings
There are two small ferry crossings you will be required to take on the trail: one at the southern trailhead (Gordon River) and another at the mid-way point (Nitinhat Narrows). You will need to show your trail permit to be able to get the boat at each crossing.
The Gordon River ferry operates at 8:30 am, 11:30 am, 12:30 pm, 1:30 pm and 3.30 pm. The Nitinaht Narrows Ferry operates between 9:30 am to 4:30 pm as needed. It’s your responsibility to make sure you’re at the ferry in time before the last boat.

If starting at the southern trailhead, the Gordon River ferry crossing will be the first thing you do on the trail. After orientation, the Parks Canada ranger will walk you over to the boat. You will then be taken across the river to the start of the trail.
If finishing at the southern trailhead, there is a buoy next to the final ladder to raise, to let the ferry operator know you’re there and ready to be picked up.
The Nitinaht Narrows Ferry is at the mid-way point of the trail, at km 32 from Pachena Bay.
Note: If you’re starting at the mid-way point, you will also have to get a water taxi from Nitinaht Village to the start of the trail. The water taxi runs once a day at 9 am and costs $70 CAD, payable directly to the Nitinaht Ferry Operator.
The Crab Shack
At the Nitinaht Narrows Ferry crossing, you will also find the iconic Crab Shack, where you can stop for one of the freshest and best meals of your life!
The Crab Shack and Nitinaht Narrows Ferry are both run by the local Ditidaht people. One of the highlights of the trail is stopping for a meal at the Crab Shack before or after getting the ferry across the river.

The aptly named restaurant catches crab and salmon fresh from the river, which it cooks and serves with a fully-loaded baked potato. The crab is the freshest you will ever taste! It’s stored live in a cage in the water, until it’s needed to be cooked.
They have a few other items on the menu as well, such as breakfast and some baked goods, as well as ice cold beer and sodas, and snacks to take with you. They even sell toilet paper and other items you might need on the trail, in case you’re at risk of running out!
When we ate at the Crab Shack $50 got you half a crab, a piece of salmon and a loaded potato, which was well worth the price!

Orientation
There is an information centre at each start point where you will be required to check-in and complete a mandatory orientation session prior to commencing your hike.
At Pachena Bay and Gordon River, orientation is held at the Parks Canada West Coast Trail Information centres daily at 10 am and 2 pm. At the mid-way point, orientation takes place at the Nitinaht Visitor Centre in Nitinaht Village at 7:30 am and 3:30 pm daily.
Terrain
The terrain on the West Coast Trail is extremely varied. For a lot of the trail, there is a beach walking option, where you will encounter sand, boulders, rock shelves, slippery sandstone and gravel. The inland trail takes you through the forest where you will navigate roots, mud, switchbacks and boardwalk sections.
One of the most iconic things about the trail is that there are also more than 70 ladders to climb along the trail! Some of these are as high as 9 m (30 ft) and many of them are back-to-back, in and out of steep gorges.

There are also several manual cable cars to get across some of the larger rivers. Riding these is a fun experience, but it’s also quite the arm workout, as you will have to pull yourself a good distance. If there hasn’t been much rain recently, certain riverbeds might be dry, so you can skip some of the cable cars and instead cross on foot.
Ascent and Descent
The total elevation gain (and loss) you can expect over the course of the entire trail is around 1,800 m (5900 ft).
A lot of the ascending and descending you will do on this trail is from going up and down ladders. There are also some switchbacks and ups and downs along the inland section of the trail. Although, as this is a coastal hike, you won’t find yourself hiking uphill for hours on end on this trail.

History of The Trail
An important thing to note about the West Coast Trail is that the entire trail is on indigenous land. The trail passes through the traditional territories of the Ditidaht, Huu-ay-aht and Pacheedaht First Nations, who have inhabited the area for thousands of years. There are also several First Nations reserves along the trail, which are private property, so be respectful of this.
Originally, the area was used by local First Nations peoples as travel and trade routes. During the 1800s and 1900s European ships started navigating the west coast of Vancouver Island. However, they would frequently get shipwrecked due to the rugged coast, bad weather and fog.
The shipwrecks in the area were so common, this stretch of coast was named the “Graveyard of the Pacific”. In response, the Dominion Life Saving Trail was created by linking old First Nations pathways and telegraph route. This trail allowed for stranded sailors to escape or be rescued.

As technology improved and the Dominion Life Saving Trail was no longer needed, it became part of the Pacific Rim National Park. In the 1970s and 1980s, the trail was restored and improved by Parks Canada, to be used by hikers. Today, remnants of the trail’s origins can still be seen along the trail, including several pieces of shipwrecks and an old steam donkey engine!
West Coast Trail Difficulty
The West Coast Trail is generally considered to be a strenuous hike, since there is a lot of technical terrain. However, the weather and route you take will have a lot to do with this!
The trail gets VERY muddy
When we hiked the trail it was a relatively dry year. So we didn’t have as much mud and slippery terrain to contend with as in other years. Normally, the forest trail gets VERY wet, as you’re likely to encounter some rain during your hike. Generally, the more mud, the more difficult the hike will be.
The muddy sections are tricky to navigate and it’s not uncommon to encounter knee-deep mud! Most hikers find using trekking poles helpful to get through these sections, and wearing gaiters can keep the mud out of your boots (or at least some of it).

There are lots of obstacles!
However, mud isn’t the only challenge on the trail. The forest trail also has a lot of roots and up and down sections. The ladders are physically difficult as you are climbing with your heavy pack, and the cable cars require a lot of upper body strength to pull yourself across.
And the beach sections aren’t always easier! The sand can be thick and heavy, making it hard to move through, and there are sections of slippery sandstone shelves, surge channels and boulder fields to cross. These obstacles can be especially difficult to navigate on your own, so if hiking solo it’s best to team up with other hikers for these more challenging sections, or opt for the inland trail.

The level of difficulty depends on your experience and fitness level
Judging how difficult the trail will be for you, really depends on how much experience you have and your level of fitness.
Although I wasn’t an experienced backpacker when I hiked the West Coast Trail, I do a lot of exercise and was physically fit. So I found the ladders, up and down sections, and hiking with a heavy pack relatively easy. In fact, I love the little burst of cardio I get from it!
Where I struggled more was with some of the technical terrain. In particular, getting through the boulder field and over the surge channels, largely due to a fear of slipping. I was glad to be doing these sections with other hikers who were able to reassure me, and grab my hand just in case I were to slip.

Safety on The Trail
Like with any hike, safety should always be a priority. On the West Coast Trail, there are several key safety considerations to keep in mind:
Slippery Terrain
The terrain on the trail can get very wet, resulting in slippery boardwalks and ladders. There are also a number of beach walking sections which see you going over slippery sandstone shelves (in particular, watch out for sections with green Algae). Make sure to be extra careful on these sections, and wear boots with good tread!
Tides
The beach route on the trail is not always passable when the tides are high. The tides can also come in very quickly and could be dangerous or result in you getting stranded if your timing is off. Therefore, you should always make sure you understand the tide tables and plan your route accordingly.

You will be given a basic copy of the tide table along with an official trail map at orientation. However, it is advisable to bring a more detailed tide table with you too. You can download the Port Renfrew, Bamfield or Tofino tide table to bring with you.
In addition, you can download the new West Coast Trail App. The app can be customized to your hike and shows an overview of each section of the trail, including the passable tides.
READ MORE: Review of the new West Coast Trail App
Tip: Also keep the tides in mind when pitching your tent, so you don’t get wet! When we completed the trail we witnessed some unlucky hikers having to move their tent in the middle of the night after they got wet!
Wildlife
Pacific Rim National Park is home to a wide range of wildlife, including black bears, cougars, and wolves. Sighting wildlife is always an exciting experience, but you don’t want to get too close, as it’s not good for you or the animal. Therefore, you should take precautions to ensure you stay safe.
On the trail it’s recommended to carry bear spray and NEVER leave food unattended or inside your tent. The designated campsites all have food caches for you to store your food in. Although, if there is no space in the caches, then you will need to hang your food from a tree, at least 100 metres away from any tents.
If you’re lucky enough to spot any wildlife on the trail, always keep a safe distance. If you do encounter a bear, make yourself as big as possible, make lots of noise, and be ready to use your bear spray if it gets too close.

Campgrounds
There are 13 designated campgrounds on the West Coast Trail. Although technically, you’re allowed to camp anywhere along the trail, except for in the First Nations reserves, and between kms 34 and 38 due to wildlife.
The campsites are mostly on the beach, although some campgrounds have forest sites as well. Most of the designated campgrounds come with outhouses and food caches, and all are close to a fresh water source.
Designated Campgrounds
| Campground | Location | Sites | Facilities | Popularity |
| Michigan Creek | 12 km from Pachena Bay | Beach & some forest spots | 1 outhouse, 2 food caches & 1 food hang | High |
| Darling River | 13.8 km from Pachena Bay | Beach & some forest spots | 1 outhouse & 2 food caches | High |
| Orange Juice Creek | 15 km from Pachena Bay | Beach & some forest spots | None | Low |
| Tsocowis Creek | 16.8 km from Pachena Bay | Beach | 1 outhouse & 1 food cache | Medium |
| Klanawa Creek | 22.8 km from Pachena Bay | Beach & some forest spots | 1 outhouse & 1 food cache | Low |
| Tsusiat Falls | 24.9 km from Pachena Bay | Beach | 2 outhouses, 3 food caches & 1 food hang | High |
| Cribs Creek | 42.5 km from Pachena Bay | Beach & some forest spots | 1 outhouse & 2 food caches & 1 food hang | High |
| Carmanah Creek | 46.1 km from Pachena Bay | Beach | 1 outhouse & 2 food caches | Medium |
| Bonilla Point | 48 km from Pachena Bay | Beach & forest | 1 outhouse & 2 food caches | Low |
| Walbran Creek | 53 km from Pachena Bay | Beach & forest | 2 outhouses & 3 food caches | High |
| Cullite Cove | 58 km from Pachena Bay | Beach | 1 outhouse & 2 food caches | Medium |
| Camper Bay | 62.2 km from Pachena Bay | Beach | 2 outhouses & 2 food caches | High |
| Thrasher Cove | 70 km from Pachena Bay | Beach & some forest spots | 1 outhouse, 2 food caches & 1 food hang | High |

Reservations & Permits
Permits are required for the West Coast Trail and you MUST reserve them in advance.
There are 70 spots to start the trail each day: 25 starting from the northern trailhead (Pachena Bay), 25 from the southern trailhead (Gordon River) and 20 from the mid-way point (Nitinaht Narrows).
For the 2024 season, reservations will open at 8 am PST on January 22, 2024.
It’s important to be ready to book as soon as reservations open. This is a very popular hike, so the best dates book out extremely quickly!
If you do miss out on your preferred dates, don’t worry, as there are still some options to secure a permit. Cancellations are quite common, and there is usually availability early and late in the season which can be booked a bit closer to the time. To find out more about your options, check out my guide about how to get reservations.

Or, if you’re hoping to hike the trail the following year, make sure you check the Parks Canada website as of December for announcements about reservation opening dates, so you can be ready to book as soon as they open!
Trail Map
You will be given a physical copy of the West Coast Trail map at your orientation before you start the trail. However, it’s always best to familiarize yourself with the map beforehand, so you can plan your ideal route.
Here is the current trail map provided by Parks Canada, which you can download:

The map includes information on the tide levels that the beach sections are passable at.
You should also familiarize yourself with the tide tables when planning your route. The Port Renfrew and Bamfield are the closest ones to use. Although the trail map is actually based on the Tofino tide table, which is equally reliable.
You can also access the trail map and tide information through the new West Coast Trail App. However, you should never solely rely on an electronic device to replace a paper map. So, if using the app, always carry a paper map as well.
No matter how prepared you are with planning your route, keep in mind that your plan will likely change as you get further into your hike. It’s good to have a rough plan for your ideal route, but different factors like the weather and how tired you are may impact your itinerary, which is OK!

Getting To The Trailhead
Planning how to get to the trailheads is best done in advance. If you don’t plan ahead, you risk missing out on a reservation for your chosen mode of transport. This could mean missing out on doing the trail this season.
Getting to Vancouver Island
The first thing you will need to plan is how to get to Vancouver Island.
The most common way to get to Vancouver Island is by ferry from Vancouver to Nanaimo (Departure Bay) or Victoria (Swartz Bay), or from Seattle to Victoria. Getting the ferry is my preferred option as it allows you to bring your own car, so you won’t have any issues trying to check-in your camping gear.
If you aren’t able to take the ferry, the best alternative is to fly to Victoria International Airport (YYJ) or Nanaimo Airport (YCD).

Driving to The Trailheads
If you’re coming by car, you will have to drive and park at one of the two WCT trailheads. I recommend driving to the southern trailhead (Gordon River), as it’s a much easier drive than to the northern trailhead (Pachena Bay).
The drive to Pachena Bay includes 75 km of unpaved logging roads, which can be dangerous, and you risk causing damage to your car. Plus parking at the northern trailhead is unsupervised and there have been issues in recent years with break ins.
The drive to the southern trailhead is much easier (although the roads towards the end can be a little confusing). Plus, the parking at the trailhead is more secure. It does cost $5 CAD per day, but the parking is close to the adjoining campground office and Parks Canada office.
The parking is technically monitored, although keep in mind that this doesn’t guarantee anything, as there have still been reports of break-ins at the southern trailhead. However, they seem to be less frequent than at Pachena Bay.
Tip: Download offline maps before your trip (or bring a printed map), as there is no phone signal for most of the drive to the trailheads!
The WCT Shuttle
Once you’re on Vancouver Island, the easiest way get to and from the trailheads is with the West Coast Trail Express. This shuttle service runs daily between May and September.
The shuttle travels between the northern trailhead (Pachena Bay/Bamfield), southern trailhead (Port Renfrew/Gordon River) and Victoria, as well as to the Juan de Fuca trailhead and Sooke.
What most hikers do is park their car at one end and get the shuttle bus to or from the other trailhead. Although if you don’t have a car, getting the shuttle bus from Victoria is a great option.
Prices vary based on your place of departure. Although the cost to travel between the two WCT trailheads is $95 CAD.
Be warned – the shuttle service is not the most comfortable way to travel, as it’s an old school bus with no air conditioning, and the roads are rough! In particular, the road to Pachena Bay and Bamfield involves 75 km of unpaved logging road.

What to Pack For This Hike
There are a lot of essential items to bring with you on your hike. As you will be camping, and given the varied terrain and weather on the west coast, you need to come prepared.
It’s also important to keep your pack weight down, so only bring what is really necessary and use lightweight equipment. You should aim for your pack weight to be around 15-20% of your body weight (although sometimes this rule can be difficult to stick to)!
Here is an overview of the key things you will need for the West Coast Trail, plus some optional items to make your hike more comfortable. However, if you want a more detailed guide to packing for the trail, check out my Complete WCT Packing List.
Documents
- Trail permit: This will be given to you by the ranger when you check-in for your hike on your first day and is essential to have on you during your hike.
- National parks pass: You must buy a National Parks pass to hike the West Coast Trail (you can buy it in advance or at check-in).
- West Coast Trail map: This will be given to you at check-in and is an essential item to bring.
- Tide table: This will also be given to you at check-in BUT it is very basic. Therefore, I recommend printing off a more detailed one ahead of time, such as the Port Renfrew, Bamfield or Tofino tide table. Note – To be able to use the tide table, make sure to also bring a time-keeping device, like a watch or phone!
- Guidebook (optional): For detailed information about each section of the trail, you should read the Blisters & Bliss guide book. Some hikers like to bring the book with them, but I just took photos of the relevant pages to consult as needed.

Hiking Essentials
- Backpack: As you will be carrying all your equipment and food for 6-7 days with you, you will need to have a good quality backpack which can fit everything. A pack between 55 to 70 L should be sufficient.
- Hiking boots: Just as an important as having a good pack, is have a good pair of hiking boots or shoes. You should make sure your boots are the right fit and are worn in before your hike.
- Gaiters: Gaiters are an item most WCT hikers consider essential to keep mud, sand and stones out of their boots.
- Trekking poles: Trekking poles are another item which most hikers consider essential. I didn’t find them that helpful since we hiked during a dry year, but when there is deep mud I can imagine they really help with balance!
- Rain gear: The West Coast Trail can be a very wet hike. You can protect your gear by using a pack cover and lining your pack with a large bin liner.
✅ Recommended Item: Osprey Ariel Plus 70 – this is the pack I used and it is so comfortable and stable for carrying a heavy load. It also comes in smaller sizes if you feel the 70 L is too big.
Camping Equipment
- Tent: For backpacking trips like the West Coast Trail, investing in a lightweight tent is a good idea. It’s best to have a double wall tent, to reduce condensation inside, as there’s a lot of moisture in the air on the west coast, and in case of rain, it must have a waterproof rain fly. The MSR Hubba Hubba 2-Person Tent is one of the best tents on the market for this trail!
- Sleeping pad: A sleeping pad is really important to a good night’s sleep. For the West Coast Trail you will need a minimum R value of 2.5. I love the Therm-a-Rest NeoAir XLite NXT and the Nemo Tensor Ultralight Insulated Sleeping Pad.
- Sleeping bag: Equally as important as a sleeping pad, is a sleeping bag. I recommend a temperature rating between 0°C to +5°C for this hike. Because the trail gets quite wet, it’s also best to choose a synthetic bag over down, since it dries faster.
- Pillow (optional): A camp pillow is very much an optional item, but I would never camp without it! My favourite is the REDCAMP Outdoor Camping Pillow.
- Tarp (optional): This is another optional item, but is worth bringing if there is likely to be quite a lot of rain on your hike, to provide shelter for cooking and to relax at camp.
✅ Recommended Item: MSR Hubba Hubba 2-Person Tent – The Hubba Hubba is widely considered one of the best backpacking tents and is the one we used on the West Coast Trail. It’s lightweight, durable, and comfortable for 2 people (there are also 1 and 3 person options available). We have even used it several times in the windy conditions of Patagonia and it has always held up very well!

Food & Water
Water:
- Water filter: There is lots of fresh water on the West Coast Trail, but you will need to filter it before drinking. My favourite is the Katadyn BeFree water filter, as it’s lightweight, compact and quick to use. As an alternative, you can also use chemical water purification tablets or drops.
- Water bottle: As there are regular water sources to fill up on the trail, I recommend bringing a 1 to 1.5 litre water bottle.
Cooking:
- Stove, gas & lighter: You will need a backpacking stove, gas canister and lighter to cook meals at camp (unless you plan on cold soaking your food!)
- Cookware & dinnerware: As part of your cooking setup you will also need a small lightweight pot, mug and bowl, and spoon or spork. To save space, you can even get collapsable cookware and dinnerware!
Food:
- Breakfast & dinner: These should all be meals which you just need to add water to. Oatmeal is the best option for breakfast. For dinner, dehydrated backpacker meals, ramen noodles, instant mac and cheese, and instant mashed potatoes are all great options.
- Lunch & snacks: You likely won’t have a proper lunch on the West Coast Trail. Instead, you will probably snack throughout the day. Bread or crackers, peanut butter, Nutella, trail mix, dried fruit, jerky, tuna pouches, chocolate bars and candy are all great lunch and snack options.
- Tea, coffee & hot chocolate (optional): Instant coffee and hot chocolate packets are easy to bring for your caffeine or sugar fix, and drinking herbal tea is a great way to warm up in the evening.
- Condiments: To ensure your food has enough flavour, don’t forget to bring some basic condiments! Salt is a must, but you can also easily pack pepper, chili powder, or your other favourite spices. The best way to store them is in mini camping salt and pepper shakers.
Extra Items:
- Ziploc bags: Remember that everything you pack in, you must pack out! Therefore, bring some Ziploc bags to use as your rubbish bin and throw it out at the end of the trail.
- Food bag: Bring a bag (like a dry sack) to keep all your food and cooking items together. You will then store the food bag in the food caches overnight, so it’s out of reach of bears and critters.
✅ Recommended Item: Katadyn BeFree 1.0 L Water Filter Bottle – The Katadyn BeFree water filter is super easy to use and quick to filter water. It’s also very small so takes up no space in your pack and can double as an extra water bottle (you can even drink straight from the filter). This is the filter we used on the West Coast Trail and it served us really well.

Clothing
Hiking Clothes:
- Hiking pants or tights: Choose what works best for you but make sure it is quick dry. I would actually recommend checking out lululemon’s hiking pants and leggings.
- Shorts (optional): If the weather is going to be warm, it can also be a good idea to bring hiking shorts, or zip-off pants to keep your pack weight down. My favourite are the Convertible High Rise Hiking Jogger from lululemon.
- 2 quick dry shirts/tops: It’s a good idea to bring one long sleeve and one short sleeve quick dry tops. Then you can alternate your layers based on the weather.
Note – I’ve been really impressed with lululemon’s new hiking range and I highly recommend checking them out (for both men and women). I also often wear their running gear for hiking which I love because it’s lightweight, durable, quick drying and super comfortable.
Camp Clothes:
- Sleepwear / thermals: Bring lightweight sleepwear. Depending on how cold it will be, thermal base layers are a great option and tend to be very compact.
- Clean clothes: Bring a change of clean clothes to wear at camp. Some people will choose to wear their camp clothes as sleepwear, to keep their pack weight down.
Underwear & Socks:
- Socks: I recommend bringing 2 pairs of hiking socks to alternate between, and a clean pair of socks to wear at camp and sleep in. In particular, I would recommend Darn Tough hiking socks, which are super comfortable and durable.
- Sports bra: One quick dry sports bra is enough as you can air it out or rinse it at camp.
- Underwear: How much underwear you bring really varies from person to person. Plenty of hikers swear by just 1-2 pairs and wash them as they go, whereas I prefer to have fresh underwear each day and the ones I pack are small and lightweight so don’t take up any room in my pack.

Outer Layers:
- Rain jacket: As you know by now the West Coast Trail can be very wet, so bringing a rain jacket is an essential item. It will also double up as an extra layer of warmth and a windbreaker on the trail. Although on the pricier side, I love the Patagonia Torrentshell 3L Jacket and the lululemon Half Zip Hiking Pullover. But Helly Hanson and Columbia also sell excellent quality (and slightly more budget-friendly) rain jackets.
- Rain pants (optional): If it’s looking to be a very wet season, bringing a pair of rain pants can also be a good idea to keep your legs dry.
- Lightweight puffer jacket or fleece: The nights (and sometimes days) can get cold on the trail, so it’s important to bring a warm lightweight layer.
Extra Items:
- Warm hat or buff: Having something to keep your head warm at camp is important so you don’t get sick on the trail!
- Sun protection: As well as being prepared for rain, you should be equally prepared for sun on the West Coast trail. Make sure to pack polarized sunglasses and/or a sun hat.
- Gloves (optional): If you’re hiking early or late in the season, or get cold easily, bringing a pair of fleece gloves can also be a good idea.
- Camp/water shoes (optional): This is an item I HIGHLY recommend bringing. Having a spare pair of shoes to change into at camp is so nice for tired and sore feet. Plus, they can double up as water shoes, incase you encounter any water crossings.
✅ Recommended Item: In my opinion Darn Tough hiking socks are the best on the market. They’re really comfortable and durable. Plus they come with a lifetime guarantee. So if you ever get holes in them you can get them replaced for free!
Safety & Hygiene
- Bear Spray and holster: There are bears, cougars and wolves on the West Coast Trail. Although an encounter is unlikely, you should always come prepared with bear spray, which is easily accessible in a holster.
- First Aid Kit: It is essential to pack a range of first aid items, such as moleskin and some basic medications. I also suggest including some items to repair your gear with (such as duct tape). And make sure your kit is stored in a waterproof bag.
- Sunscreen: You will be outside all day, so make sure to be sun safe!
- Toiletries: You will need to bring basic toiletries such as a toothbrush and toothpaste, a hairbrush and hair ties, moisturizer and lip balm. Wet wipes, biodegradable soap and/or a small towel is also really nice to have to clean your face and body at the end of the day.
- Toilet Paper and hand sanitizer: There are outhouses at the trail’s campsites, but toilet paper and sanitizer is your responsibility to bring.
- Eye Care: If you’re a glasses or contacts wearer, make sure to pack sufficient supplies to see you through the trail (pun intended).
- Feminine Hygiene supplies: To be safe, it’s always best to pack some back-up supplies, even if you’re not expecting your time of the month on the trail.
- Bug spray: Bugs aren’t that bad on the West Coast Trail, but if you’re sensitive to bites, it doesn’t hurt to bring some.

Electronics
- Headlamp: To be able to find your way around camp at night, and in case you get stuck hiking in the dark, you should always have a headlamp.
- Phone or watch: Bringing a phone or watch is essential to keep track of the time, especially for the tides. You may also get some (very weak) phone signal at some spots on the trail.
- Satellite Communications Device (optional): As this is a relatively busy trail, this is an optional item. But if the worst does happen, you will be grateful to have a satellite GPS device on you, such as the Garmin In Reach Mini. so I would always recommend having one.
- Power bank (optional): If you have devices which will need to be charged, bring a power bank. However, if you’re really conservative with using your devices, and keep them on airplane mode, you may be able to get away without charging them.
- Headphones (optional): I like to have headphones to listen to an audiobook or podcast to help me fall asleep while backpacking.
- Camera (optional): A camera is a luxury item to bring for those passionate about photography. Although, personally, I find my phone camera works well enough for me.
✅ Recommended Item: Garmin In Reach Mini 2 – In my opinion this is the best GPS satellite communication device on the market. It’s so compact and lightweight, while also being extremely effective.
Additional Items
- Swimwear: This is a coastal trail after all! The water is COLD, but it feels so nice to go for a swim to freshen up at the end of the day.
- Microfiber towel: If you’re planning on swimming then make sure to pack a towel to dry off. Microfiber towels are the best as they are super lightweight and compact.
- Gardening / utility gloves: This might sound odd, but there are a lot of rough surfaces you will be touching on this trail. A pair of basic utility gloves can be really helpful for climbing ladders and for navigating the boulder field, which is full of sharp barnacles.
- Cash: If you’re starting at the mid-way point, you will need cash to pay for the water taxi. And if you plan on buying anything at the Crab Shack, you will need to pay in cash! I recommend taking at least $100 CAD per person to make sure you have more than enough money.
- Rope: It’s always handy to have rope with you on a backpacking trip. If you’re bringing a tarp you will need rope to hang it, and it’s good to have in case the food caches are all full so you can hang your food from a tree. I recommend paracord.
- Earplugs: The campgrounds can get noisy, so if you’re a light sleeper bring a pair of earplugs to block out the noise.
Click here for my Complete West Coast Trail Packing List

FAQs
How long does it take to walk the trail?
Most people hike the West Coast Trail in 6 or 7 days (5 or 6 nights). The maximum amount of time you can take to hike the trail is 14 days, since this is how long you’re allowed to stay in the park once you start the trail.
More experienced hikers may prefer to hike the trail in 4-5 days, which is also very doable. There are even some ultra trail runners who will attempt to run the trail in one or two days!
Although a lot of people prefer to take their time to really enjoy being on the trail, so it’s not uncommon for hikers to spread their time out over about 10 days. The duration of the hike really depends on your preferences.
How many miles is the West Coast Trail?
The official length of the West Coast Trail is 47 miles (75 km). However, most hikers who track their hike find that their GPS device counts a few more miles than this.
The length of the trail will vary slightly depending on how much of the beach trail versus forest trail you do, and how much you explore along the way. Everyone’s hike is unique, so the distance varies from one hiker to the next.
The average extra distance most hikers see is around 6 miles (10 km). But I have heard of people clocking as much as 15 miles (25 km) extra!

What is the best time of year to hike the WCT?
The West Coast Trail is open from May 1 to September 30 each year. Hiking anytime during this period should be a fantastic experience!
Although the most popular time to hike the trail is July and August. This is when there is the warmest and driest weather, so is generally considered the best time. However, if you hike early or late in the season, you will get the benefit of a quieter trail, and can still get lucky with the weather.
How expensive is this hike?
The West Coast Trail isn’t the cheapest hike you can do, but I think it is well worth the price!
The fees to hike the trail are $241.75 CAD per person (including taxes) which you pay at the time when you make your reservation. This includes the trail permit ($160), two ferry crossings ($28 each) and the reservation fee ($25.75).
You will also need to pay a National Parks Entry fee (or buy the Parks Canada National Discovery Pass). And, if you’re starting the trail at the mid-way point (Nitinaht Narrows), you will also need to pay a $70 water taxi fee directly to the Nitinaht Ferry Operator. Plus, you will incur additional expenses getting to and from the trail and preparing for your hike.
See here for the full breakdown of how much the WCT costs and list of additional expenses.

Can you camp anywhere on the trail?
Almost! You can camp anywhere on the West Coast Trail except for between kms 34 and 38, since there is too much wildlife activity there. There are also some First Nations reserves along the trail which you aren’t allowed to camp in, since it’s private property.
Most hikers will stick to camping at the designated campgrounds, since they have food caches and outhouses. Plus, there’s a community feel at the campgrounds and its nice to socialize with other hikers.
However, if you’re looking for a quieter and more remote experience, you will get this from wild camping on the trail. When wild camping, make sure to consider the tides in choosing the location. You will also need to properly hang your food from a tree, at least 100 metres away from your tent.
How can you prepare for this hike?
Preparing for this hike is different for everyone. There are three key things you need to prepare for: the physical challenge of the hike, the technical elements, and camping.
If you’re a seasoned backpacker and have plenty of experience camping in the backcountry, then you likely already have all the gear you need and know how to use it. If not, then it’s important that you do your research, buy the right equipment and learn how to manage your campsite. Doing some shorter overnight hikes to test and practice using your equipment before hiking the WCT is a good idea.
Given the trail’s uniqueness, it’s likely that at least some of the technical elements will be a new experience for most hikers. Learning how to read tide tables, scale ladders with a heavy pack, and plan your route around tight timeframes, technical terrain and various obstacles, are all things to prepare for before your hike.

Finally, making sure you’re physically prepared for the West Coast Trail is important. If you’re not already hiking or working out regularly, then it’s definitely worth starting to do this in the weeks leading up to the trail. It’s important to have good lower and upper body fitness for the trail, as you will be using your arms almost as much as your legs.
When I hiked the trail, I was already doing different workouts as part of my weekly routine. Therefore I didn’t do any specific training for the West Coast Trail, but I know many people find it beneficial to do so. For example, hiking up hills or stairs with your pack can be a great way to start getting your legs ready!
Final Thoughts on the West Coast Trail
The West Coast Trail truly is one of the most unique and spectacular hikes in the world. But it’s not an easy hike and is one you should be prepared for.
If you take the time to prepare properly and do your research, and you have a sense of adventure, then you will have an amazing time.
And hopefully this post has provided you with all the information you need to start planning your West Coast Trail adventure, for the hike of a lifetime!
READ MORE
WCT Packing List, How To Pack & What NOT To Bring
How To Get West Coast Trail Reservations
West Coast Trail App: Overview & Review of the New App
21 BEST Things To Do On Vancouver Island: Unique & Fun Experiences