Complete Guide to Hiking the West Coast Trail [2026]
The West Coast Trail is one of the most iconic backpacking routes in Canada—and for good reason. Located on the rugged southwestern edge of Vancouver Island, this multi-day trek takes you through lush rainforest, along rocky beaches, and across tidal flats that are only passable at low tide. Add in countless ladders, cable cars, river crossings, and unpredictable weather, and you’ve got one of the most unique, challenging and rewarding hikes in the world.
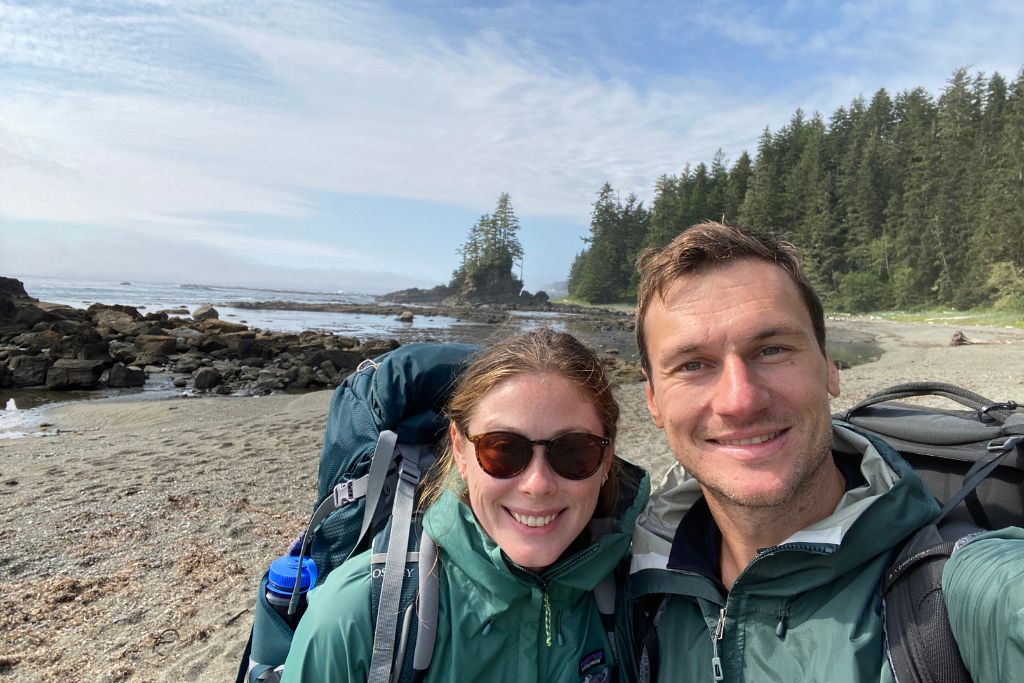
I hiked the West Coast Trail in 2021, and it still ranks as one of the most unforgettable outdoor adventures I’ve ever done. I’m even hoping to go back and run it one day!
This guide is packed with everything you need to know about Canada’s West Coast Trail—whether you’re planning your first trip or just want to see if this bucket-list hike is right for you.
Chasing Chanelle contains affiliate links and is a member of the Amazon Services LLC Associates Program. If you make a purchase using one of these links, we may receive compensation at no extra cost to you. We only recommend products and services we use and trust. Read our disclaimer for more information.
📌 Quick Facts |
|
|---|---|
| Distance | 75 km (47 miles) |
| Trail Type | Point-to-point (Pachena Bay ↔ Gordon River, with Nitinaht access) |
| Typical Duration | 5 to 8 days |
| Difficulty | Very challenging (mud, ladders, tides, cable cars) |
| Season | May 1 – September 30 |
| Permit Cost (2026) | CAD $184.75 + $23.75 orientation fee + $11.50 reservation fee (+ relevant ferry fees & national park entry fees) |
| Camping | Designated beach campsites only |
| Cell Service | None – carry a GPS or satellite communicator |
| Transportation | Trailhead shuttles and ferries required |
The West Coast Trail is an incredible adventure, but it’s not one you can take lightly. Proper planning and preparation are essential. To help you get ready, check out my West Coast Trail packing list and West Coast Trail reservations guide.
What Is the West Coast Trail?
The West Coast Trail is a unique multi-day backpacking route located on the southwestern edge of Vancouver Island, British Columbia. It winds through old-growth rainforest, along rugged beaches, and across tidal shelves, and has more than 70 ladders and cable cars—all set within the heart of Pacific Rim National Park Reserve. It’s widely considered one of Canada’s most iconic and challenging hikes.
Originally built as a life-saving route for shipwrecked sailors, the trail passes through the traditional territories of the Huu-ay-aht, Ditidaht, and Pacheedaht First Nations. Today, it’s one of the best places in Canada to experience the raw beauty of the West Coast, spot wildlife, and immerse yourself in a true backcountry adventure.
Distance & Duration
The official length of the West Coast Trail is 75 km (47 miles), but most hikers end up walking closer to 85–90 km depending on the routes they choose. You’ll often have the option to walk along the beach or take the inland trail, and small detours, tide timing, and campsite choices can all add distance. Some GPS trackers have even recorded distances up to 100 km (62 miles)!
Most hikers take 5 to 8 days to complete the trail, depending on pace, weather, and whether they plan rest days. Your Parks Canada permit allows you to be on the trail for up to 14 days, so you have plenty of flexibility to hike at your own speed—or wait out storms. A few ambitious hikers even trail run the route in 1–2 days, though that’s far from the norm.

A Brief History of the Trail
The West Coast Trail travels entirely through the traditional territories of the Huu-ay-aht, Ditidaht, and Pacheedaht First Nations, who have inhabited and stewarded this region for thousands of years. Long before it became a hiking trail, the area was used by Indigenous peoples for travel, trade, and subsistence.
In the late 1800s and early 1900s, as European ships began navigating the treacherous west coast of Vancouver Island, this stretch of shoreline became known as the “Graveyard of the Pacific.” Dozens of vessels were wrecked due to rough seas, rocky reefs, and dense fog.
In response, the Dominion Life Saving Trail was created in 1907 by connecting existing First Nations paths and telegraph routes. Its purpose was to aid in the rescue of shipwreck survivors, allowing them to escape the coast and reach help.
As navigation technology improved and shipwrecks became less frequent, the trail was eventually decommissioned. But in the 1970s and 80s, Parks Canada restored the route as part of Pacific Rim National Park Reserve—transforming it into the iconic backcountry trail it is today.
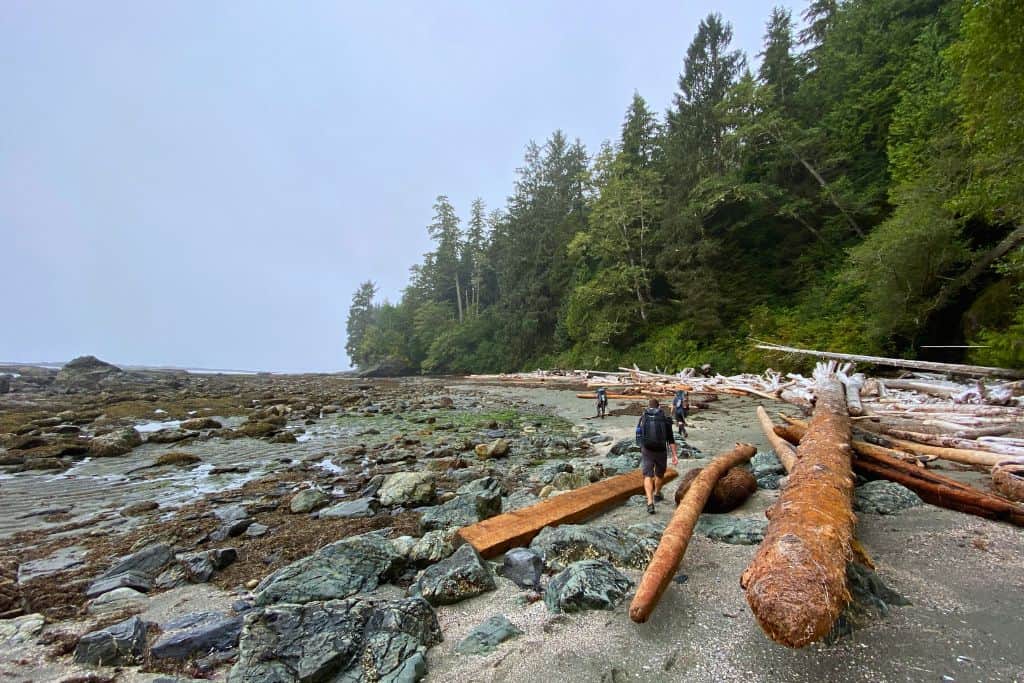
Along the route, you’ll still spot remnants of its past: from rusted shipwreck debris to an old steam donkey engine, a relic of the area’s early logging history.

Is the West Coast Trail Right for You?
This trail is stunning—but it’s not for everyone.
The West Coast Trail is a physically demanding hike that requires stamina, experience, and the ability to adapt to constantly changing conditions. You’ll face dozens of ladders (some over 30 feet tall), deep mud, slippery boardwalks, tidal crossings, and cable car river crossings. And you’ll need to carry everything on your back—including food, shelter, and gear—for 5 to 8 days.
That said, you don’t need to be an elite athlete or seasoned mountaineer. If you’re relatively fit, have some backcountry camping experience, and are willing to train and plan ahead, you can absolutely do it—and it’ll be unforgettable. If you’re unsure, consider starting with a shorter Vancouver Island trek like the Juan de Fuca Trail (temporarily closed) or Cape Scott Trail to test your gear and stamina.
This trail is also best done as a group or with a hiking partner, but plenty of people do hike it solo each year. Just be prepared to be fully self-reliant—and keep in mind that rescue access can take hours or even days in poor conditions.
When to Hike the West Coast Trail
The West Coast Trail is only open for a few months each year, from May 1 to September 30. Outside of this window, the trail is officially closed due to dangerous conditions like high tides, storm damage, and unstable infrastructure.
So when’s the best time to go?
Best Months to Hike
The most popular time to hike the trail is from late June to early September, when the weather is generally warmer, drier, and more predictable. July and August tend to have the lowest rainfall and the most hikers—but since daily permits are capped at 70 people per day, it never feels overcrowded, even in peak season.
If you want to avoid the crowds, early May or late September can be a good option—but you’ll need to be prepared for colder nights, heavy rain, and more slippery terrain. Some cable cars may also be inoperable early or late in the season due to storms, and Parks Canada may close certain sections of the trail on short notice if conditions are unsafe.
We hiked in August and couldn’t have asked for better conditions!

What About Rain?
This is coastal rainforest terrain, so wet weather and mud are part of the experience—even in summer. In fact, many hikers say it’s not a matter of if it rains, but when. Bring quality rain gear, pack your essentials in dry bags, and mentally prepare to get muddy. If you luck out with sunny skies the whole way, consider it a bonus.
When I hiked the trail in 2021, we got lucky—just a couple of grey days and barely any rain. That said, our rain jackets/windbreakers still came in handy, and some sections of the trail were still seriously muddy.
Watch the Tides
Several sections of the trail are only passable at low tide, so tide charts aren’t optional—they’re essential. You’ll receive a tide table during check-in at the trailhead and you can also access tide info through the West Coast Trail app.
You’ll want to pay especially close attention near Owen Point and the tidal shelf sections around Thrasher Cove. Poor timing here can be really dangerous, add hours to your day, or even force you to skip one of the most scenic and memorable parts of the trail.

West Coast Trail Permits, Fees & Reservations
To hike the West Coast Trail, you’ll need to secure a reservation and pay a combination of trail, reservation, and Parks Canada fees. Reservations for the 2026 hiking season are now live. Permits sell out very fast, so planning ahead is key.
Your trail permit allows for up to 14 days on the West Coast Trail, so there’s no need to rush. Most hikers take 5–8 days, but you can stretch it out if you prefer a slower pace or want to factor in bad weather days.
What You Need to Reserve
To hike the full trail—or even just a section—you’ll need to reserve the following:
- West Coast Trail Backcountry Use Permit: CAD $184.75 per person (2026 rate)
- Orientation Fee: CAD $23.75 per person
- Reservation Fee: CAD $11.50 per group
- National Park Entry Fee: CAD $12.25/day per person or $24.50/day per group
- Note: not required if you have an annual Discovery Pass
- Ferry Fee: CAD $56 total, if hiking the full trail
- $28 for the Gordon River crossing (south end)
- $28 for the Nitinaht Narrows crossing (midpoint)
- Water Taxi: CAD $70 (only applies if you’re starting or ending your hike at Nitinaht)
💡 Note: The fees apply whether you hike the full trail, part of the trail, or are planning just a day hike.

When Do Permits Open?
For the 2026 season, reservations open on February 5 at 8:00 am PST. Popular dates—especially in July and August—often sell out within minutes, so it’s worth setting a reminder and be ready to book as soon as they open!
How to Make Reservations
You can book your West Coast Trail permits on the Parks Canada website, or by calling 1-877-737-3783.
💡 Tip: Create your Parks Canada account ahead of time and have your group details ready to go. You can book for up to 4 people in one reservation.
Cancellation & Changes
- Permit changes can only be made if space is available.
- Cancellations must be made at least 21 days before your trip for a partial refund.
- The reservation fee is non-refundable, even if you cancel.
Entry Points & Trail Direction
You can hike the trail northbound (Gordon River to Pachena Bay) or southbound (Pachena to Gordon)—or start at the Nitinaht Narrows midpoint and hike in either direction, for a shorter adventure. Regardless of which direction you choose, a permit is required.
When you book, you’ll choose your start date and entry point. You must start your hike at the trailhead on the date chosen. You will also be asked to provide your exit point and number of days on the trail, but you don’t need to stick to this.

Orientation Sessions
Before hitting the trail, all hikers are required to attend a mandatory orientation session at their chosen trailhead. This session is run by Parks Canada and covers essential safety info, wildlife protocol, weather updates, and trail conditions.
You must attend the orientation on the day of your hike or the day before. You’ll need to show your reservation at check-in, and you won’t be allowed to start the trail without attending.
Orientation sessions are held at the following times:
- Gordon River (Port Renfrew): 10:00 am and 2:00 pm daily
- Pachena Bay (Bamfield): 10:00 am and 2:00 pm daily
- Nitinaht Village (mid-trail start): 7:30 am and 3:30 pm daily
West Coast Trail Map
You’ll receive a physical trail map at your orientation session before starting the hike. But it’s a good idea to review the route in advance so you can plan your days and get familiar with the beach vs. inland sections.
Here is the current trail map provided by Parks Canada, which you can download:

The map includes useful information about the trail layout, campsites, elevation, and the tide levels needed to safely access certain beach sections. The map is also available in the West Coast Trail App.
Getting There & Trail Transportation
Since the West Coast Trail is a point-to-point hike, getting to and from the trailheads takes some planning—especially if you’re hiking the full route.
There are three official trailheads:
- Pachena Bay (northern trailhead near Bamfield)
- Gordon River (southern trailhead near Port Renfrew)
- Nitinaht Narrows (midpoint access via boat from Nitinaht Village)
Getting to Vancouver Island
Most hikers begin their trip by taking a BC Ferry to Vancouver Island:
- From Vancouver (Horseshoe Bay) to Nanaimo (Departure Bay)
- From Vancouver (Tsawwassen) or Seattle to Victoria (Swartz Bay)
Ferries are the best option if you’re driving, as they allow you to bring your car.
If you’re flying, there are regular flights to both Victoria (YYJ) and Nanaimo (YCD). For something more scenic, you can also take a seaplane from downtown Vancouver to Victoria!

Driving to the Trailheads
Each trailhead has parking, but some are easier to reach than others:
- Gordon River (Port Renfrew): Large gravel lot across from the West Coast Trail office and Pacheedaht Campground. Parking is $10/day, paid at the campground office.
- Pachena Bay (Bamfield): Free parking in the Pacific Rim National Park lot by the trailhead. This lot is unsupervised, and break-ins have been reported in recent years.
- Nitinaht Village (Balaats’adt): Parking is available in the campground for $10/day, paid at the West Coast Trail office.
If you’re driving, the most comfortable way to handle logistics is to park at your finishing point and shuttle to your starting point, so your car is waiting when you’re done.
💡 Tip: I recommend parking at Gordon River, as it’s the easiest to access by paved road. Both Pachena Bay and Nitinaht Village are reached via active logging roads, which were recently chip-sealed but can still be dangerous and rough in places. Always drive with caution and allow extra time.
West Coast Trail Express (Shuttle Bus)
The West Coast Trail Express runs daily shuttles during hiking season between:
- Victoria ↔ All three trailheads
- Nanaimo ↔ All three trailheads
- Gordon River ↔ Nitinaht ↔ Pachena Bay
The bus is an old school bus, and the ride between Gordon River and Pachena Bay is long—up to 4 hours with some rough sections on logging roads.

Ferries and Water Taxis
Gordon River Ferry
If starting or ending at Gordon River, you’ll cross the river by boat. This ferry is mandatory and costs $28, which is included in your WCT reservation fee. The crossings operate at 8:45 a.m., 10:30 a.m., 11:30 a.m., 12:30 p.m., 1:30 p.m., 2:30 p.m. and 3:30 p.m.
Nitinaht Narrows Ferry
There’s a second ferry crossing at Nitinaht Narrows, roughly halfway through the trail, at the famous Crab Shack. This one is also mandatory and prepaid as part of your permit (also $28). The crossings operate on an as needed basis between 8:30 a.m. and 4:30 p.m.
Nitinaht Water Taxi
If you’re starting or ending your hike at Nitinaht Narrows, you’ll also need to book a water taxi between Nitinaht Village and the trail. This costs $70 one-way and is paid directly to the ferry operator at the dock.

Where to Stay Before and After Your Hike
Many hikers choose to stay near the trailheads the night before starting the West Coast Trail, especially if they want to start their hike early in the day. Others prefer to stay a bit farther away—such as in Victoria or Nanaimo—and drive in the morning. Just keep in mind that the roads to the trailheads can be slow-going, especially the logging roads.
Near the Southern Trailhead (Gordon River)
- Pacheedaht Campground – A popular choice right at the trailhead. Staying here puts you steps away from the Parks Canada office, parking lot and ferry crossing.
- Port Renfrew – This small town has a few other lodging options, including cabins, B&Bs, and small inns like Wild Coast Wilderness Resort or the Hiker Huts.
Near the Northern Trailhead (Pachena Bay)
- Pachena Bay Campground – Located at the northern trailhead and operated by the Huu-ay-aht First Nations. A peaceful spot right on the beach, ideal if you’re starting or finishing in Bamfield.
- Bamfield – This tiny, remote village has a few accommodation options including Woods End Landing and the Hacas Inn, though availability is limited so book early.
Near the Midpoint (Nitinaht Narrows)
- Nitinaht Campground – For those starting at Nitinaht Narrows, a section of the campground is reserved for West Coast Trail hikers starting the trail.
No matter where you stay, be sure to reserve well in advance—accommodation near the trailheads is limited and often fills up quickly during hiking season.

Section-by-Section Overview
The West Coast Trail is typically tackled in one direction—from Gordon River to Pachena Bay (northbound) or in reverse (southbound). While the full route spans 75 km, the difficulty and pace vary significantly between sections due to tides, terrain, and weather.
Here’s a breakdown of what to expect in each portion of the trail, based on hiking northbound:
Gordon River to Thrasher Cove (6 km / 3.7 mi)
- What to expect: You’ll start with the tallest ladder of the hike right after the ferry crossing, followed by one of the toughest sections of the trail. You’ll encounter steep climbs, mud, roots, and uneven terrain through dense forest, before a steep descent down to Thrasher Cove.
- Highlights: About halfway between Gordon River and Thrasher Cove, you’ll come across the remains of an old steam-powered “donkey engine” used in early logging operations. It’s now covered in moss and ferns, sitting right off the trail—it’s one of the most memorable and photogenic relics of the trail’s industrial past.

Thrasher Cove to Camper Bay (8 km / 5 mi)
- What to expect: Two routes to choose from — the beach route, which is only passable at low tide and is one of the most difficult but rewarding sections of trail, taking you through a huge boulder field, over several surge channels, and along exposed sandstone shelves. Or, the forest route, which is less technical but slightly longer, with frequent ladders and muddy sections. Both routes are slow-going and often underestimated.
- Highlights: If tides allow, the beach route includes one of the most iconic parts of the trail — Owen Point, with its stunning sea caves and rock formations. Plus, scrambling over huge rocks and navigating the tide pools along the rugged boulder field is a true West Coast Trail rite of passage.
💡 Tip: Bring a pair of cheap gardening gloves — the boulders are rough, wet, and covered in sharp barnacles that can cut your hands!

Camper Bay to Walbran Creek (9 km / 5.6 mi)
- What to expect: This section of the trail is entirely inland, and many hikers consider it the most physically demanding part of the hike. You’ll face an endless series of mud, ladders, log crossings, and slippery boardwalks, along with some steep, rooty climbs and descents—especially at Sandstone Creek, Cullite Creek, and Logan Creek.
- Highlights: A major highlight is the dramatic Logan Creek suspension bridge, which spans a deep gorge and offers one of the most impressive views on the trail.

Walbran Creek to Cribs Creek (11 km / 6.8 mi)
- What to expect: This section is mostly beach walking, with long stretches along the sand and a short inland portion. While it’s less technical than the previous section, walking on soft sand can still be tiring—especially with a heavy pack.
- Highlights: The beach walking here is some of the most enjoyable on the entire trail. You’ll also pass the Nytom Burger Shack (formerly Chez Monique’s)—it’s not always open, but if you’re lucky, stop for a burger and a cold drink!

Cribs Creek to Tsusiat Falls (16.5 km / 10.3 mi)
- What to expect: This is one of the longest stretches on the West Coast Trail and features a mix of beach and inland walking. The terrain is varied—expect sandy beaches, boardwalks, muddy forest trails, and some rocky sections. While not overly technical, the distance can be tiring, especially in hot or wet conditions. Be mindful of tides near Dare Point, where the beach route may not be passable.
- Highlights: This stretch passes through Nitinaht Narrows—the midway point—where you’ll find the famous Crab Shack (this is also where you’ll take the ferry across the tidal channel). Stopping here for fresh crab and a loaded potato is a true highlight of the trip. Plus, you’ll end at Tsusiat Falls, where you can camp right next to the beautiful waterfall.

The Crab Shack
The Crab Shack is one of the most legendary stops along the West Coast Trail. This floating kitchen is run by members of the Ditidaht First Nation and serves up fresh Dungeness crab, fish, loaded baked potatoes, grilled cheese sandwiches, and cold drinks (including beer and pop). After days of freeze-dried meals and oatmeal, it’s a true highlight—most hikers say it’s the best meal of the entire trip.
💡 Tip: Bring cash if you can! Credit cards are accepted but have a 10% surcharge. I recommend budgeting around $100 per person if you want to enjoy a full meal and drinks—the food is pricey but absolutely worth it!

Tsusiat Falls to Michigan Creek (13 km / 8 mi)
- What to expect: This stretch is relatively easy compared to earlier sections. The trail features a mix of beach and inland forest walking, with some boardwalks, gentle inclines, and minimal technical challenges. The only real obstacle is the Darling River, which you’ll need to ford—but it’s not usually very deep, and you may even be able to hop across the rocks without getting your feet wet.
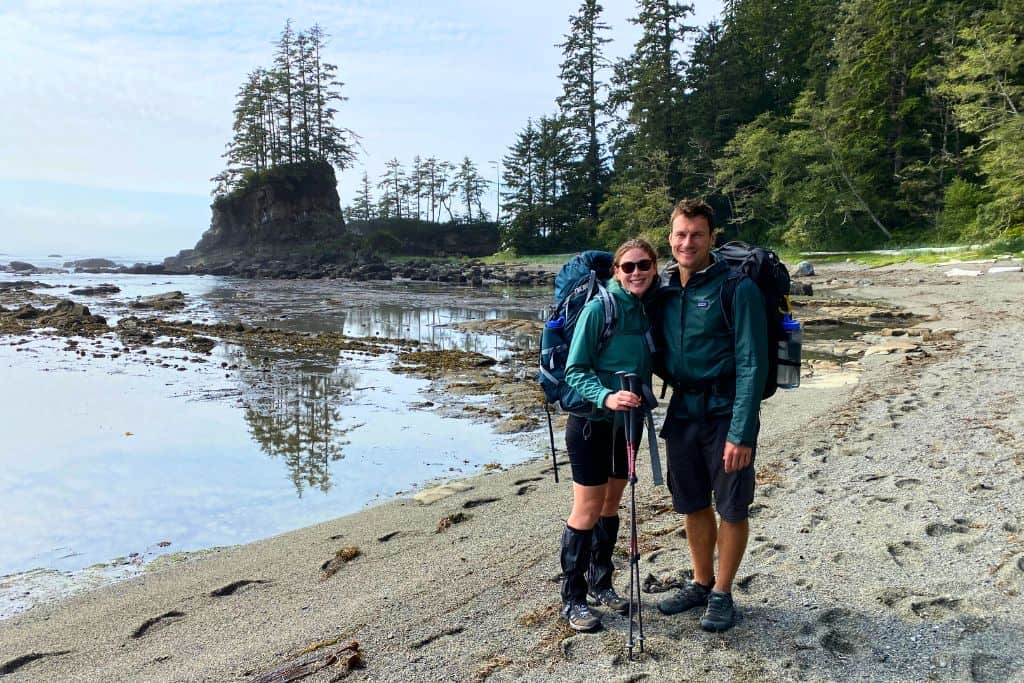
- Highlights: You’ll pass through peaceful forest, cross the Klanawa River via cable car, and enjoy bluff-top viewpoints where you might spot marine wildlife. This is also where you’ll find the iconic pair of red Muskoka (Adirondack) chairs—perfect for a mid-hike break with a view.

Michigan Creek to Pachena Bay (12 km / 7.5 mi)
- What to expect: The final stretch to Pachena Bay is one of the easiest and best-maintained parts of the West Coast Trail. The route stays entirely inland, except for a short (0.5 km) optional beach walk at the very end (tide permitting). Expect well-groomed forest paths, wooden bridges, and long stretches of boardwalk, with a few ladders.
- Highlights: About 3 km from Michigan Creek, a short side trail leads to a bluff-top viewpoint where you can often spot sea lions. You’ll also pass the Pachena Lighthouse (although the grounds are now closed to visitors) and several scenic viewpoints before reaching the northern trailhead.

Trail Difficulty & Conditions
The West Coast Trail is known as one of Canada’s most challenging backpacking routes—not just because of the distance, but because of the relentless terrain, obstacles, and unpredictable weather. That said, how difficult it feels will depend heavily on your fitness level, experience, and the conditions when you hike.
Terrain
The terrain is incredibly varied. You’ll switch constantly between beach and forest routes, each with their own challenges.
- Beach walking involves soft sand, slippery boulders, tidal shelves, surge channels, boulder fields, and uneven rock.
- Inland forest trails are muddy, rooty, and full of ups and downs, with sections of slick boardwalk and broken planks.
One of the trail’s most iconic features is its ladders—there are over 70 of them, many of which are steep, tall (up to 9 m / 30 ft), and stacked in quick succession to descend into or climb out of deep gullies. You’ll also cross rivers using manual cable cars, which require you to pull yourself and your pack across using a pulley system—fun, but definitely a workout!
In dry years, some riverbeds are low enough to walk or wade across instead, letting you skip some of the cable cars. But I liked taking them when I could, as it was all part of the experience.

Ascent & Descent
You’ll gain (and lose) around 1,800 m (5,900 ft) over the full length of the trail. This might not seem like much if you’re used to hiking in the mountains. But while there are no long climbs, the constant up and down—especially on ladders—adds up fast. Inland routes also have steep switchbacks and rolling terrain that can wear you down over time.
Mud, Roots & Slippery Sections
Even if you’re hiking in an unusually dry year, expect to get muddy—sometimes knee-deep. Slippery roots, boards, and wet ladders can all add to the difficulty. Trekking poles and gaiters are strongly recommended for stability and to help protect your boots and legs.

Not Just a Physical Challenge
The West Coast Trail isn’t just physically demanding—it’s also mentally challenging, especially on solo hikes. Navigating obstacles like surge channels, boulder fields, and tricky sandstone shelves can be intimidating if you’re afraid of slipping. Many hikers team up for these sections or opt for inland detours when solo.
Difficulty Depends on You
The difficulty of the West Coast Trail depends a lot on your personal fitness, experience, and comfort with technical terrain. But make no mistake—this is not a trail for beginners. It requires backcountry knowledge, confidence with rough terrain, and the ability to safely navigate unexpected obstacles, often in remote conditions without cell service.
That said, this was actually my first self-supported multi-day backpacking trip—but I was already an experienced hiker, in good physical shape, and well-prepared with gear, route research, and safety planning. Plus, my hiking partner was very experienced in the backcountry. Even with all that, I still found some sections challenging, especially the more technical parts like the boulder field and surge channels.
If you’re unsure whether you’re ready, it’s better to gain experience on shorter backcountry trips first before attempting the West Coast Trail.

Safety & Wildlife on the West Coast Trail
Safety on the Trail
The West Coast Trail is remote, rugged, and full of natural hazards. Once you’re on the trail, rescue may take hours—or even days—depending on weather and helicopter availability, so it’s essential to be self-sufficient and prepared for emergencies.
Here are a few key safety tips:
- Don’t underestimate the terrain: Slippery ladders, surge channels, mud pits, and boulders are physically demanding and can cause injuries—especially with a heavy pack.
- Be prepared for rain and cold: Even in summer, this part of the coast gets frequent rain and fog. Hypothermia is a real risk if you’re wet and temperatures drop. Make sure to bring sufficient warm and waterproof layers!
- Solo hikers should take extra precautions: While solo hiking is allowed, it’s safer to team up with others for tricky sections like surge channels or cable cars. Always leave your itinerary with someone and check in once you’ve finished.
- Emergency exits are limited: There are only three official exit points along the trail (Pachena Bay, Nitinaht Narrows, and Gordon River). If you need to exit due to an emergency elsewhere, Parks Canada will arrange for evacuation via boat or helicopter.
- Carry a satellite communicator: A device like a Garmin inReach Mini is highly recommended in case of emergency. There’s no cell service along the trail.

Tides & Coastal Hazards
Tide timing is one of the most important safety factors on the West Coast Trail. Many beach sections, surge channels, and rock shelves are only passable at low tide—and getting caught out can be dangerous or even life-threatening.
- Use the tide tables: You’ll be given a tide chart at orientation—refer to it daily when planning your route.
- Watch for surge channels: These fill rapidly and unpredictably as the tide rises, creating strong currents that can sweep you off your feet.
- Take extra caution on sandstone shelves: These can be extremely slippery—watch out for green algae in particular.
- Time beach walks carefully: Some stretches are only safe at low tide, especially around Owen Point. Leave plenty of buffer time.
- Have a backup plan: If a section looks unsafe or you’re too late, take the inland route instead—even if it’s slower.
Although you’ll receive a tide table at orientation, it’s a good idea to bring a more detailed version. The most accurate ones are for Port Renfrew, Bamfield, and Tofino. The West Coast Trail App also includes tide tables and can be customized to your hike, showing passable tide windows for each section.
💡 Tip: Keep the tides in mind when choosing your campsite—some beach spots may look fine during the day but become risky at high tide. During our hike, we saw a few unlucky campers scrambling to move their tents in the middle of the night after the water crept in!

Wildlife You May Encounter
The West Coast Trail is rich with wildlife—but that also means taking proper precautions:
- Bears: Black bears are occasionally spotted on the trail—in recent years, some have even been seen climbing ladders! Make noise while hiking, keep your distance, and never leave food unattended. Use the bear lockers provided at campsites to store all food and scented items. If the lockers are full, hang your food from a tree at least 100 metres from any tents. Carrying bear spray is strongly recommended.
- Cougars: Cougars live in the region, though sightings are rare. However, some hikers have reported being stalked on the trail. Be alert, make noise, and avoid hiking alone if cougars have been sighted.
- Wolves: Coastal wolves are sometimes seen along the trail (though you’re more likely to spot their prints in the sand). Keep your distance and never approach them.
- Marine life: You might spot whales, sea lions, seals, and otters offshore. Along the beaches and tidal shelves, watch for crabs, starfish, sea anemones, and other delicate intertidal creatures. Be careful where you step and avoid disturbing tide pools to protect this fragile ecosystem.
- Rodents: These are the most common campsite pests. Seal food tightly and don’t leave anything edible in your pack overnight—they will chew through it!
Always follow Leave No Trace principles to minimize your impact and reduce risk to both you and the wildlife. And, never feed wild animals, even rodents or birds—this disrupts their natural behaviour and can make them more aggressive toward future hikers.

Campgrounds
There are 13 designated campgrounds along the West Coast Trail. While technically you can camp anywhere outside of First Nations reserve land and the restricted wildlife corridor between kilometres 34 and 38, most hikers stick to the official sites. They’re conveniently spaced, close to water sources, and have basic outhouses and bear-proof food storage.
Most campgrounds are located directly on the beach, though some also have forest sites for extra shelter. Campsites are first-come, first-served—so arrive early if you’re hiking in peak season and hoping for a prime spot.
Here is an overview of the designated West Coast Trail campgrounds:
| Campground | Location | Sites | Facilities | Popularity |
|---|---|---|---|---|
| Michigan Creek | 12 km from Pachena Bay | Beach & some forest spots | 1 outhouse, 2 food caches & 1 food hang | High |
| Darling River | 13.8 km from Pachena Bay | Beach & some forest spots | 1 outhouse & 2 food caches | High |
| Orange Juice Creek | 15 km from Pachena Bay | Beach & some forest spots | None | Low |
| Tsocowis Creek | 16.8 km from Pachena Bay | Beach | 1 outhouse & 1 food cache | Medium |
| Klanawa Creek | 22.8 km from Pachena Bay | Beach & some forest spots | 1 outhouse & 1 food cache | Low |
| Tsusiat Falls | 24.9 km from Pachena Bay | Beach | 2 outhouses, 3 food caches & 1 food hang | High |
| Cribs Creek | 42.5 km from Pachena Bay | Beach & some forest spots | 1 outhouse, 2 food caches & 1 food hang | High |
| Carmanah Creek | 46.1 km from Pachena Bay | Beach | 1 outhouse & 2 food caches | Medium |
| Bonilla Point | 48 km from Pachena Bay | Beach & forest | 1 outhouse & 2 food caches | Low |
| Walbran Creek | 53 km from Pachena Bay | Beach & forest | 2 outhouses & 3 food caches | High |
| Cullite Cove | 58 km from Pachena Bay | Beach | 1 outhouse & 2 food caches | Medium |
| Camper Bay | 62.2 km from Pachena Bay | Beach | 2 outhouses & 2 food caches | High |
| Thrasher Cove | 70 km from Pachena Bay | Beach & some forest spots | 1 outhouse, 2 food caches & 1 food hang | High |
💡 Tip: Even at high-use campsites, it’s important to follow Leave No Trace principles. Pack out all trash, use the outhouses (not the forest), and be respectful of other hikers—especially in crowded areas.

What to Pack for the West Coast Trail
Packing for the West Coast Trail is all about balance: you need to be fully prepared for remote backcountry conditions, but also keep your backpack as light as possible.
You should aim for your pack to weigh about 15–20% of your body weight. That said, many people end up carrying more than that—especially first-timers (I know I did!). Choose lightweight gear where you can, and pack smart.
I’ve outlined the key items to pack below. But, for a more detailed breakdown, check out my full West Coast Trail Packing List.
Documents
- Trail permit (provided at check-in)
- National Parks pass
- WCT map (provided at check-in)
- Printed tide table (provided at check-in)
- Guidebook (optional): Blisters & Bliss is the go-to; bring the book or photos of key pages
Important Note on Maps & Tide Charts: While the Parks Canada trail map and tide table are provided at orientation, you should always carry backups. I also recommend printing a more detailed tide chart and packing a watch or phone for tracking the time. While the West Coast Trail App is useful, never rely solely on electronics. Always bring a physical map in case your device fails.

Hiking Essentials
- Backpack (55–70L, supportive & comfortable)
- Hiking boots (well broken in)
- Gaiters (to keep out mud/sand)
- Trekking poles (especially if it’s a wet year)
- Rain gear (pack cover + dry bag/large bin bag)
✅ Recommended: Osprey Ariel 55-70 L Pack
Camping Gear
- Lightweight waterproof tent (double wall recommended)
- Lightweight Sleeping pad (R-value 2.5+)
- Sleeping bag (0°C to +5°C rating; synthetic dries faster than down)
- Camp pillow (optional, but worth it for the extra comfort)
- Ultralight Tarp (optional, great for rain shelter)
✅ Recommended: REDCAMP or TETON Sports camp pillow
Food & Water
Water:
- Water filter or purification tablets (I highly recommend Katadyn BeFree)
- Water bottle (1–1.5L capacity, I recommended Nalgene bottles)
Cooking:
- Backpacking stove + gas + lighter
- Small pot, mug & spork/spoon (titanium or collapsible options are ideal)
Food:
- Breakfast & dinner: dehydrated meals, oatmeal, ramen, etc.
- Snacks: trail mix, dried fruit, peanut butter, jerky, candy, etc.
- Hot drinks (optional): tea, coffee, hot chocolate
- Condiments (small spice shakers – salt & pepper goes a long way!)
- Ziploc bags (for trash)
- Food bag (e.g. dry sack for food cache storage)
✅ Recommended: Katadyn BeFree 1.0L Water Filter

Clothing
- Hiking pants or tights (quick-dry)
- Shorts or zip-offs (optional)
- 2 Shirts: 1 short-sleeve + 1 long-sleeve (quick dry)
- Sleepwear or thermals
- 2-3 pairs of hiking/wool socks (I highly recommend Darn Tough)
- Underwear & quick-dry sports bra
- Rain jacket (+ optional poncho)
- Puffer jacket or fleece (lightweight & packable)
- Warm hat or buff
- Sunglasses and/or sun hat
- Gloves (if hiking early/late in season)
- Camp/water shoes (highly recommended!)
- Optional: rain pants & clean clothes for camp
✅ Recommended: Darn Tough Hiking Socks
Safety & Hygiene
- Bear spray + holster
- First aid kit (incl. moleskin, meds, duct tape)
- Sunscreen (travel size)
- Toothbrush & small toothpaste
- Biodegradable soap (like Wilderness Wash or Campsuds)
- Toilet paper + hand sanitizer
- Feminine hygiene supplies (even as backup)
- Eye care (contacts/glasses + solution/case)
- Optional: Lip balm, bug spray & other essential toiletries
✅ Recommended: Adventure Medical Kit
Electronics
- Headlamp (rechargeable or with backup batteries)
- Watch or phone (for tide tracking & WCT App)
- GPS satellite communicator (e.g. Garmin InReach Mini)
- Optional: compact power bank, headphones, camera
✅ Recommended: Garmin InReach Mini 2
Other Handy Items
- Swimwear + microfibre towel
- Gardening gloves (great for ladders and boulders)
- Cash (at least $100 per person)
- Paracord or rope (for tarp setup or food hanging)
- Earplugs (for noisy campsites)
- Book or card game (for campsite entertainment)
✅ Recommended: Blisters & Bliss: A Trekker’s Guide to the West Coast Trail
Final Tip: Don’t overpack! It’s tempting to bring comfort items, but they add up quickly. Prioritize multi-use, compact, and lightweight gear—your back and knees will thank you!
FAQs
Most hikers complete the West Coast Trail in 6 to 7 days, though it’s possible to do it in as few as 4–5 days if you’re fast and experienced. You can also take your time and stretch it to 10 days or even the maximum 14 days, which is the limit set by Parks Canada for your stay in the park.
The official trail length is 75 km (47 miles), but most hikers end up walking a bit more. Depending on how much you explore, or whether you follow beach vs forest routes, your GPS might clock 85–90 km (53–56 miles) or even more.
The trail is open May 1 to September 30, and you can have an amazing experience at any time during this window. July and August are the driest and most popular months, while May, June, and September offer fewer crowds—but may bring more rain and muddier trail conditions.
In 2026, the permit, ferry crossings, and reservation fees total $276 CAD per person. You’ll also need to pay a National Park Entry Fee (or buy an annual Discovery Pass). If starting or ending at the midpoint you’ll need to pay for the Nitinaht Narrows water taxi . Gear, food, and transportation to and from the trail can also add up.
Not quite. You’re allowed to camp almost anywhere except between Km 34–38 (due to wildlife activity) and within First Nations reserve lands. Most hikers stick to designated campgrounds because they have outhouses, bear lockers, and water access—but remote camping is also allowed in other areas. If wild camping, be sure to check tide levels and hang your food properly.
No—there’s no reliable cell service along the trail. Plan ahead, download offline maps (like Gaia or AllTrails), and bring a satellite communication device if you want to stay connected or have a way to call for help in an emergency.
The trail is physically and technically demanding. You’ll need to be prepared for mud, ladders, slippery roots, log crossings, tides, and stream crossings—all while carrying a heavy pack. Build up your fitness with hiking, stair climbs, or weighted pack walks to strengthen both your legs and upper body. Practicing with your pack on will pay off!
And, if you’re new to backpacking, it’s best to do a few shorter overnight trips first, to test your gear and get comfortable with backcountry camping.

Final Thoughts
The West Coast Trail is one of the most spectacular and challenging hikes in the world—a true bucket list adventure. Rugged, remote, and unlike any other trail in Canada, it offers an unforgettable experience for those who are ready for it.
But it’s not a walk in the park, and preparation is key. With the right gear, some training, and a healthy sense of adventure, you’ll be well-equipped to take it on.
I hope this guide has given you the clarity and confidence to start planning your West Coast Trail journey—for the hike of a lifetime.